Hello everyone,
So today in computing we were creating a flyer for hair and beauty using InDesign. InDesign is a new program we were using in class, we hadn't used it before but it was easy to get the hang of as it uses the same programing and tools as photoshop and illustrator does.
Are task was to make a flyer for The Hair and Beauty Academy at collage to practice how to design and make flyers. After I had created this flyer I might experiment with how I could make a flyer for my blog

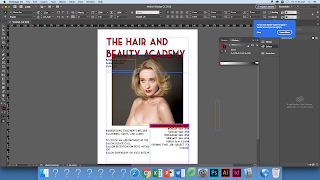
As you can see here I started off my making my flyer by inserting the image I wanted to use into my page by using the place tool into a shape so that it was in the shape I wanted. When I placed in the image it was way to big and didn't fit into the shape at all so I had to re size the image.


I started to add in the text that I wanted to include into the flyer using I chose to start off by using a text that I downloaded in a sort of retro style which I really liked, as it goes with the image I chose. I layered the text over the top of the image to create different aspects and layer.

I chose to change the colour of the text so that it went with the image I chose more by matching it to the lip colour which gave it more of a retro style to the flyer which I really like. I arranged the text at the bottom so that it was more organized and looked better.

Here is my finished flyer that I created during my class today. I really like the retro and vintage style it has as I think it really draws your attention while still giving you the information that is required.
I hope you have enjoyed looking at my work and thank you for reading.
Amy xxx
Comments
Post a Comment